
Today I’m excited to be participating in a “Blog Hop” with 7 other designers talking about design process. I’ve written a little before about the prototyping I do when I’m developing a new sewing pattern. You can look back at this post to read about the design process from the sketching stage. Today I’m going talk more about some of the construction decisions I make along the way.

This is my latest bag design, called the Flight Bag. I designed it for one of my online workshops over at Creativebug. I wanted to come up with a more structured bag that would be great for travel. I always need a functional yet stylish bag to take on the plane to hold my magazines, knitting, snacks, important papers, water bottle, etc. The format is vertical, 13″ H x 11″ W, and the depth is about 3 1/2″ so it can really hold a lot. A zippered top is a must because, you know, items tend to shift during flight and nobody wants a toppled tote to spill out during take-off or landing!

One of the most important decisions with bag design that affects it’s function is what stabilizer to use. I spend a lot of time making multiple prototypes with different interfacing, batting, fusible fleece, or combinations of those to make sure my bag has the structure I’m going for. It’s really amazing how time consuming cutting and interfacing every little piece is but it’s worth it in the long run to get the best result. This bag has both an interfaced lining (which makes it more durable and the lining behaves better inside the bag) and fusible fleece on the outer fabric to give it body and stability.
Once I have the stabilizers worked out and have settled on the the size and proportions of the bag, I focus on the details.

The Flight Bag has a great big pocket on the front with a cool piece of hardware called a twist lock on the flap. I seamed the bag front about 1/4 of the length down so that the flap could be sewn into that seam. Then I went to work on the pocket. To be really functional, It needed to have some depth so I decided on two pleats. This left a flat area in between the pleats to install the hardware.
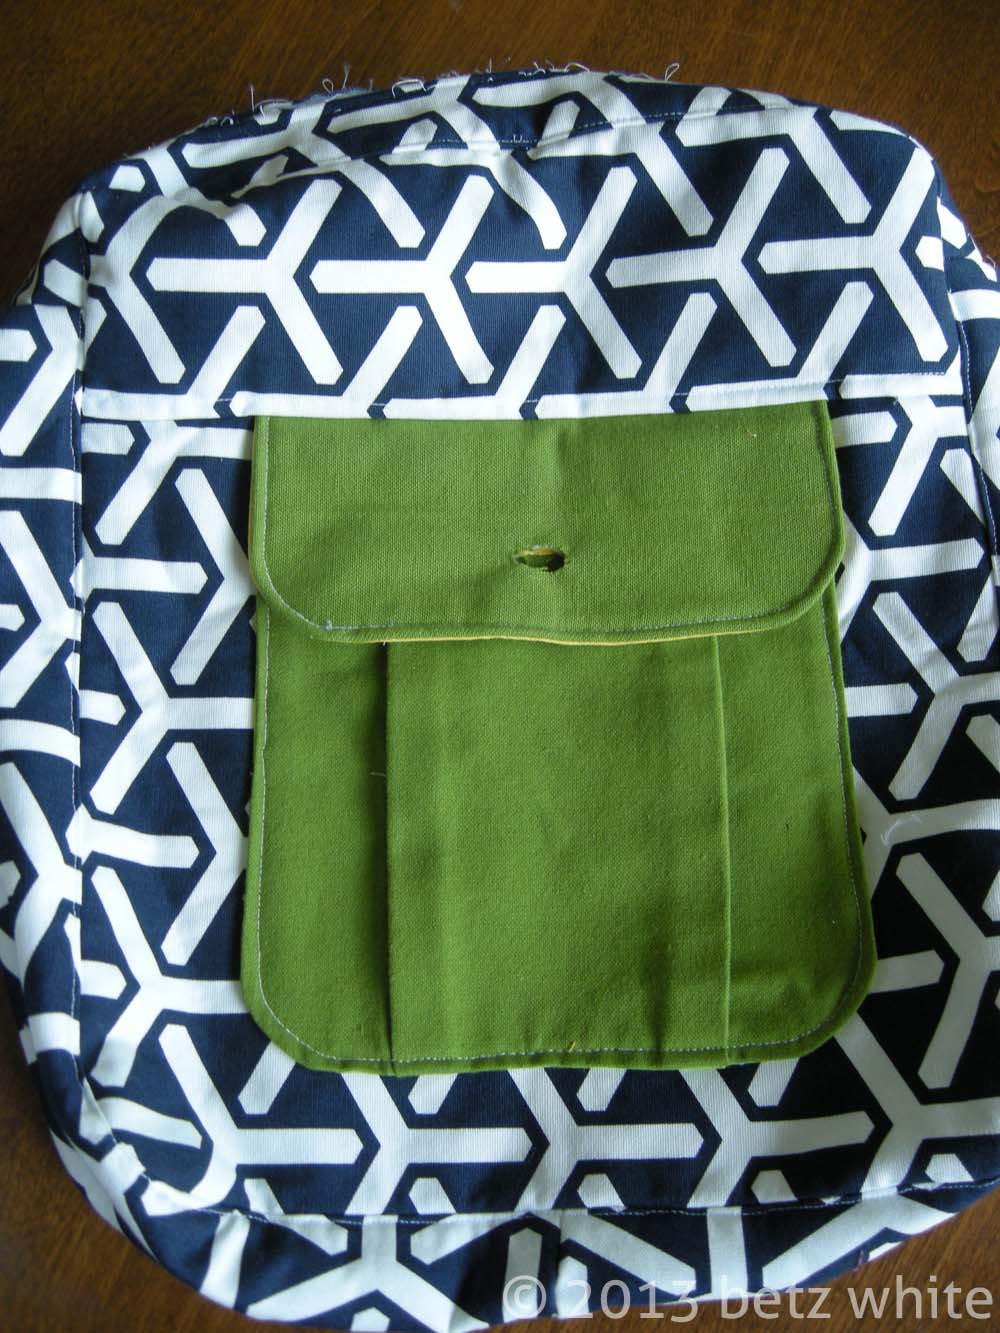
I messed around on one of my prototypes with varying depth and placement of the pocket pleats. As you can see, I used a different fabric for my prototype, but it is the same base cloth as the final fabric. It’s very important that your prototypes use the same or similar fabric in weight and construction to your final fabric. You’ll be making a lot of decisions based on your protos and you don’t want to be surprised later when things turn out differently with your final fabric.

On one of my earlier pockets I top stitched across the top of the pocket to keep the pleats in place. This resulted in the top edge being constricted and while it would still be functional it seemed to limit the ease of use.

I ended up stitching the pleats along the crease a short distance instead. This allows the top of the pocket to expand fully then lay back down into place.

Another aspect to work out in proto phase is whether or not to use an accent fabric and where. I knew I wanted to accent my grey and white canvas with a solid mustard linen. On the proto above, I mocked up a quick patterned pocket to cover the solid one. I decided that I liked the accent fabric just on the flap instead of the whole pocket. I repeated the accent on the adjustable strap and the grab handle at the top of the bag.
Something else I’m sure you noticed is that I use “real” hardware on my prototypes and then I rip it out and reuse it on other protos or even finals. That’s why you are seeing holes in the pocket flap and threads where a zipper once was in the proto photos above.

My best take away tip when developing any of my patterns is to document everything. I make notes on my prototype samples and pattern pieces to add or subtract length, seam allowance, etc. I write down the order of assembly and I take a lot of photos with my phone. The photos are especially helpful not only for remembering the stages of construction but also to make design decisions. Sometimes I’ll lay out fabrics in different combinations and photograph each one. Then I can view them “side by side” to make a judgement. Photographing them also somewhat removes me from the project and makes everything two dimensional. For me it has the effect of squinting out all of the details and leaving only balance, proportion and composition to analyze.
I hope you’ve found this part of my process enlightening! I’m willing to bet that my fellow blog hop hosts below have equally, if not more, insightful looks into their own design processes. Be sure to hop on over to each of their blogs to learn more.
 Wendi Gratz |
 test |
 Wendi Gratz |

What a difference those stabilizers make! I love the extra body the fusible fleeces gives. Your attention to details really pays off.
It’s true! I sort of have a love/hate relationship with stabilizers. 🙂 Can’t live without them!
Betz – I am in awe over the quality of your prototypes! And that is one amazing bag! I love seeing all the thought that went into designing it. The pocket alone took so much planning and testing! I’m super impressed!
Thanks! Fortunately, after doing so many bags there’s a lot that I just know will work from experience. The pocket was new for me and since it is front and center I knew I needed to spend extra time figuring it out!
What a beautiful bag! You’re so right about documentation. I’m notorious for getting all caught up in the moment and forgetting to record the details of what I’m doing. Your attention to detail is really inspiring!
Love your bag! It was nice to see the way you worked. Little changes really did make a difference. Awesome job!
Thanks for sharing.
usairdoll(at)gmail(dot)com
Thanks! It’s definitely the most constructed bag I’ve made, I really tried to push myself.
Do you look for feedback during this stage of the process? Sometimes when I’m trying out a new design, I pull in my husband (who has a great eye for design and functionality) to see what I’ve overlooked. Curious if you do the same.
I do! I show my husband too, as he has a background in product design. One of my sons really has a great eye even though he’s only 11, so I ask his opinion as well. 🙂
Thanks for doing this blog hop. It is very enlightening and it is delightful to meet other designers,their processes and products!
Thanks, Sue! I’m glad it was helpful to you.
It’s so helpful to see the process. I always feel like I am just supposed to KNOW how to do it already and that’s just not the case— you have to figure it out! Love the pocket.
I do a lot of research when I’m developing a new style. Sometimes I tend to make things harder than they need to be. It helps to evaluate many techniques then decide which one makes the most sense for my project.
Love this bag!